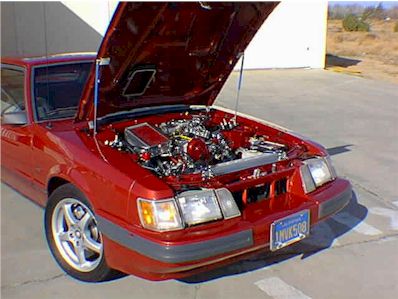
Update of Dave Sandiford's 1986 Mustang SVO At the end of the 1999 car show season, I thought I had a pretty good plan for the winter re-building project. We'd had some success showing the SVO in '99. I knew the competition, the car's strong and weak points. I had a pretty good idea about budget, and where we wanted to be for 2000. This was to be a minor make-over, mostly detail and maintenance work. An easy 2 month project even with a pessimistic schedule. Like most projects that have spiraled out of control, you could trace the beginning of the end back to a single incident. I just had to remove the wrinkle epoxy finish from that TC-Intercooler.
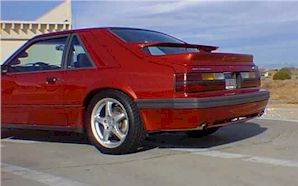
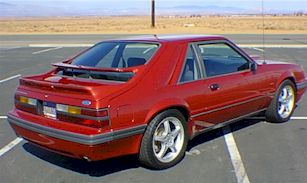
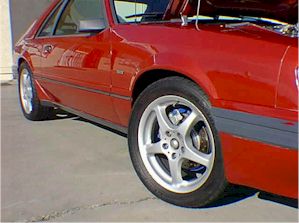
Sure, back in November I really thought I had the handle on the annual update. Wanting to give the car a more "mod" and less "resto" look, the bi-wings and the new Cervini rear diffuser were already back from the paint shop, color matched, and installed.
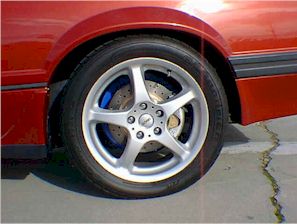
The brake shimmy was gone too, new heavy-duty Metallics had solved that. Although as long as they were that far apart, The whole assembly was detail painted, the internals were gone through, and a set of cross-drilled Autonetics rotors found a new display area behind the Konig wheels.
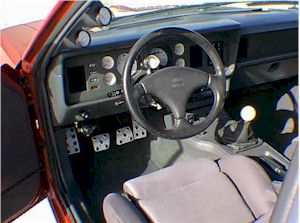
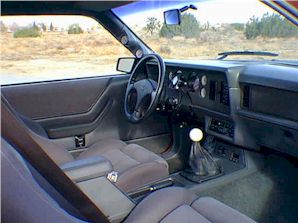
Still, things were going right along (which should have set off warning bells!). Some catalog wishbooking had spiffed up the interior with a set of BBK aluminum pedal covers, and a white Fat Knob for the shifter. I've always preferred pistol grips on pistols, actually. The 'gennie shifter is now living in a baggie.
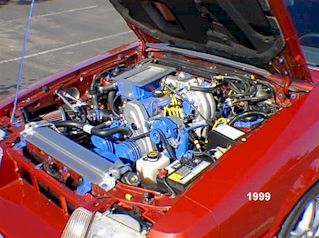
Meanwhile, the motor compartment was mostly undergoing routine maintenance, with a few new parts. A quick call to Sensors and Technologies had resulted in the replacement of that cheesy hood prop rod with a pair of their trick hydraulic struts. A few more bites out of the Debit Card, and Mustangs Unlimited was packaging up shiny covers for various components under the hood. I also fabricated some aluminum covers to clean up the motor bay, where re-routing the hoses and lines wasn't possible.
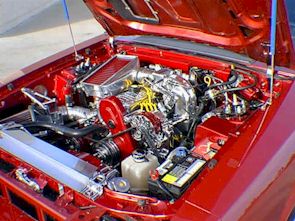
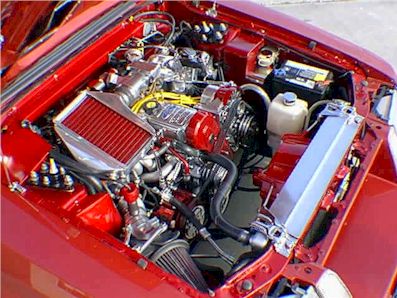
On the maintenance end, the valve seals were showing their age, and while they were being replaced, an Engle 55C was pressed into bump duty service. The motor bay was in need of fresh paint, as was the hood where the TC-IC flange was making occasional contact. I pulled the IC, and machined down the flange to a 1/4" width. This exposed the end tanks, and the smooth finish didn't match the previous blue wrinkle finish. That wrinkle finish just had to go. Sandblasting didn't seem to affect the epoxy much, so I removed it with a wire wheel, followed up by 100 grit sandpaper. Once again painted in Ford Blue, it went back to its mounting position and.........didn't look right. Sanded it down, and repainted it in the matching red metallic motor bay color. Not bad, but now the rest of the Blue Oval Blue motor scheme didn't look right. I'd try another tack. Since I had the machinery and materials, I'd polish the IC, just to see how it looked.. Nice Change! , but would look better if the 65mm Throttle Body was polished too. And the Upper/Lower Intake Manifold. But that really clashed with the Blue Valve Cover, so it got polished, and I might as well do the Alternator, and all the mounts, and .... well you get the picture. 4 months later... here's the result. Oh, the pulley's, mounts, some hard lines I bent up to replace the vacuum hoses, and anything else that was steel and un-boltable went to Highland Plating for a dip in the chrome tank.
Most everything else got painted in the Red Metallic clear coat. I like the results, it's a more traditional hot-rod look. But you know, I've been thinking about the interior and a street cage.........Maybe next year! |
© Copyright 1998 - 2026
Any redistribution or reproduction of part or all of the contents in any form is prohibited.